How To Remove Lawn Mower Blade – Six Simple Steps
Lawnmowers are an indispensable item for carrying out gardening tasks. However, the blades need changing and regular cleaning to ensure their working efficiency. No problem if you have never replaced them or do not know how to remove lawn mower blade.
In this article, we will help you with six easy steps. Let’s find out now!
Table of Contents
How To Remove Lawn Mower Blade?
Follow these easy steps on how to remove lawn mower blade as below.
Put on safety gloves
Electric tools always pose a danger to human safety. Therefore, when working with an electric-powered tool, you should wear proper protective gear, specifically gloves, in this case, to protect yourself.
Lawn blades are very sharp objects. Even a blunt one can cause you trouble if you do not pay close attention. Therefore, it is highly advisable to prepare a pair of thick gloves to ensure workplace safety.
Lift the mower
Next, determine where to remove the blade. You can do this in the backyard or in the garage. But make sure there are not any kids running around your working area.
To remove the blades, you need to lift and fix them in equilibrium first. You should create a wooden ramp to reach the blade face, which helps you easily manipulate.
Unplug the spark plug
You still cannot replace the blade immediately after lifting the lawnmower. All you need to do now is to unplug the spark plug to ensure absolute safety. If not, you can cut yourself when the machine turns on automatically. And I don’t have to tell you how dangerous it is!
Therefore, keep the spark plug away from the socket. After the repair and assembly is completed, you can put the plugin.
Jam a wood piece with the blade to stop turning
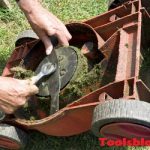
First, you will see that a pin blocks the blade in the middle. To remove the blade, it is necessary to loosen the bolt and nut. You will then need to use your hand or anything you can to keep the blade in place.
However, if you have used blades for too long since their last replacement, they may become rusted and too difficult to remove. Meanwhile, using a small piece of wood helps you secure the blade, thus moving it around more easily.
Use a proper wrench to unscrew the nut
This is the most important step. It is time to unscrew the nut when you have everything ready.
Many manufacturers use different size nuts to prevent users from taking them out, as you may not know. Therefore, you will need to use a proper wrench to remove them.
Thus, check the size of the nuts first, then try the types of spanners you have. Typically, the standard size would be 15/ 16 sockets.
Note that when using the wrench, turn the nut anticlockwise to remove and rotate in the same direction to tighten.
Remove the old blade and replace it with a new one
Once the blade has been removed successfully, you should be able to replace it with a new one. Remember that when removing things, keep different machine parts in order so they can be assembled again easily. Also, be extra cautious with the old blades after removing them to avoid any unwanted accidents. Remember to keep these blades in a safe area and pointing them downwards.
When installing a new blade, do not forget to point it towards the counter clock side. If installed upside down, you will not be able to use the blade.
Conclusion
In conclusion, keeping your lawn and yard beautiful depends on how you use your lawnmower. With a set of good blades, you will be able to work more efficiently.
Hopefully, after reading this article, you have understood how to remove the lawn mower blade. And do not forget to keep the garden tools clean and dry!


Leave a Reply