Using a band saw is not very hard
With the ability to cut the most complex and irregular designs and shapes, a band saw becomes a magnificent tool that anybody would like to own. We have already planned a shortlist grasping all major steps of how to use band saw for you.
This knowledge is from seasoned veteran woodworkers, so using tips and tricks we provided below can help you master using band saw in no time. It’s worth reading!
How To Use Band Saw?
A qualified bandsaw is a must-have tool in your workshop. It plays a key role in creating the most artistic woodworks, often found in furniture and cabinetry.
There are two valuable steps, including before and after periods, that you must be mindful of when using a band saw. Let’s move on to the next concrete parts if you want to learn more and be an expert in using a band saw.

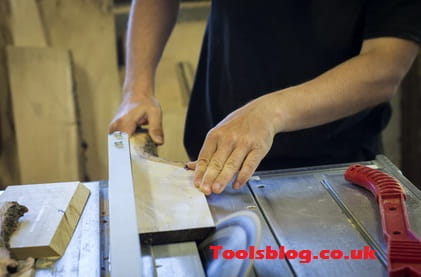
A man is working with a circular saw in a workshop
First And Foremost
Before using bandsaws, there are a couple of things that you have to dive into.
Step 1: Clean
It’s always an awesome idea to ensure that you get started with a clean and clear band saw. You will certainly get a good cut after cleaning any leftover wood from the previous use and dust around your saw.
Step 2: Installing The Suitable Blades
Some people get accustomed to using a 1.27-cm blade at all times. But sometimes, you will have to take something rougher or finer, so you need to equip various sized blades for the bandsaw, which gives you the flexibility to check and cut in each case.
Also, be mindful of checking if the blade you’re working on is the appropriate one for your current needs.
Artistic woodworks can be created by a good band saw
Step 3: Blade Tension
Because not all band saws are straightforward to operate, just a bit of blade tension changing may lead to different results on your cut. Hence, during working with the saw, do not let the blade tension be left high. Raise it to the exact level before doing a cut.
Step 4: Blade Guides
They play as the tiny holder that keeps your blade’s stable position and its level. Blade guides have two sets, consisting of one lower and one higher. All you need to do to make a perfect cut is ensure the blade is close to your guide.
Step 5: Blade Guard
Adjust the blade guard accurately
Anyone has to choose your blade guard’s size close to the wood’s to get a good cut. You will never like a big exposed blade running while you are just making a small cut. Adjusting the blade guard to a suitable level will make you feel more secure for your cut.
Step 6: Plug-In
After all the preparation steps above, let’s get started to cut after you plug in the band saw. Now it’s all ready for you to do anything you want.
After
When completing on utilizing your bandsaw, here are some following steps you should go through accordingly:
Step 1: Unplug
Unplugging should be what you think first. It’s indeed a great habit to get into because this action keeps you safe and maintains the saw better.
Step 2: Release The Blade Tension
In reality, releasing blade tension is a vital step yet often missed. Bear in mind that when you’ve done with your band saw, prioritize releasing the blade tension. This step prevents the blade from being stiff.
Step 3: Clean
Once you finish, tidy up the band saw carefully. You’d better ensure to clean any pieces of wood and sawdust that scatters and gets stuck in the band saw. After that, the band saw is ready for the next use.
Wrapping Up
All in all, the band saw is truly a versatile and great product to work with. Once you master how to use band saw properly, you can have your designs and shapes done easily.
To operate the machine as well as possible, be mindful of setting up the machine, putting the blade in the belt area properly, and use a sharpened blade to get the most seamless working process. On top of that, you can be more pleased with the final results by following the steps mentioned above.
If you find our article useful, forward it!


Leave a Reply